Note: this is part two of a two-part post on using OpenOffice.org with the OOoLilyPond extension for documents used in a Music Education setting. Please see part one for information on downloading and installing OpenOffice.org, LilyPond and the OOoLilyPond extension.
Throughout this installment, click on images to view them at higher resolution.
Throughout this installment, click on images to view them at higher resolution.
The previous post gave some background information on two common methods of mixing text with music examples in documents intended for the music education setting: using graphics exported by commercial score writing programs in a word processing document; and using the text utilities of score writing programs to place text around and between music examples. Both methods have drawbacks. They're both inordinately time consuming. Depending on which method, you can end up with music excerpts of a poor graphic quality or text that is poorly formatted. In the first case, the need to handle multiple graphic files in a single word processing document can lead to frustratingly poor system performance, resulting in hangs or crashes in the worst cases. The previous post concluded with information on how and where to obtain two open-source applications—the OpenOffice.org office suite and the LilyPond music engraving program—and an extension for OpenOffice.org called OOoLilyPond. To proceed with this tutorial, you need to have all three components installed on your system. Part one of this post can be found here. Assuming you have these three pieces of the puzzle up and running, let's get started putting them to use.
For this project, we'll be making up a short quiz – “Music Theory Quiz 3.” Let's start by opening a fresh OpenOffice.org Writer (the word processor) document. In the upper left-hand corner of your window, you should see a button called “OLy.” That's your OOoLilyPond extension and we'll be using that shortly. 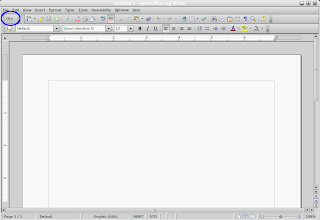
Right away, let's make sure any work we do is saved by saving the file and giving it a name. From the menu bar, choose 'File=>Save As...' or press Ctrl+Shift+S. In the resulting dialog, give it the name 'mt_quiz3' and save it to a convenient location such as your desktop. Let's add the quiz title and type a space for students to write their names. You can do this whichever way you're used to. Now we're ready to start making up the quiz. 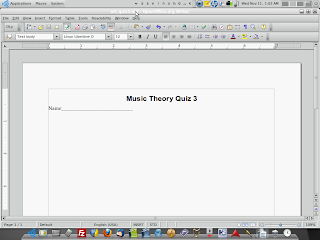


Now, when I make a worksheet or lesson, I like for text and graphic elements to be aligned and laid out in a uniform way. I've found that using tables is a great way to achieve this. Using tables requires some planning, so let's plan. This quiz will have 8 multiple-choice questions, with each question referring to a short music example. I think the best arrangement for this will be to have two columns, with four questions in each column. Let's allow each music example and each question to have its own cell, so that one excerpt and question combo would require two cells. For 8 questions in two columns, this means we need to insert a 2 x 8 table into our document. Locate the 'table' button on the toolbar and click on the down-arrow to the right. Drag the mouse down and to the right until you've highlighted a selection of 2 x 8.  Now we have a 2 x 8 table inserted into our document. Those grid lines are a distraction, so let's get rid of them. Select the whole table by pressing Ctrl+A. The table should now be shaded. On the floating 'Table' toolbar, click the 'Borders' button, then click the first button in the drop-down, the one that shows a square with no black lines around it.
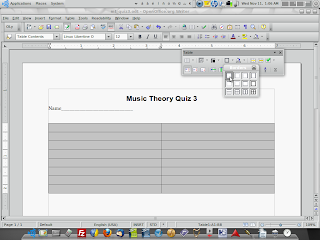
The table boundaries are still visible, but now they're not bordered with black lines and will not print. Insert the quiz instructions above the table, and now we're ready to start adding music examples and questions.
 Now we have a 2 x 8 table inserted into our document. Those grid lines are a distraction, so let's get rid of them. Select the whole table by pressing Ctrl+A. The table should now be shaded. On the floating 'Table' toolbar, click the 'Borders' button, then click the first button in the drop-down, the one that shows a square with no black lines around it.
Click inside the first cell. This is where our first question's music example will go. Go ahead and number it by typing “1.” followed by a space. Now, click on the 'OLy' button we highlighted earlier. Here's where it gets cool. The OOoLilyPond extension opens the “OOoLilyPond Editor,” a simple text-editor with some options for LilyPond.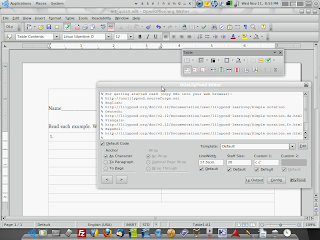
All of the default options are fine for now, so let's tap out our first music example in LilyPond code. (For information on getting started with LilyPond code, see here.) Click inside the text editor and press Ctrl+A to select all of the default code, and then press the Backspace or Delete key to get rid of it. Now, type your code, and press the 'LilyPond' button in the bottom right of the window to call LilyPond and compile your music example. 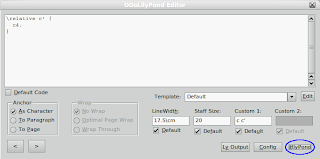
The OOoLilyPond extension will do its thing and after a few seconds, you'll have a partial measure of music right there in your document. 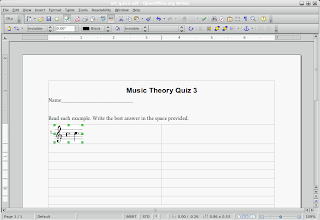
Now, click inside the second cell in the first column and compose your question. 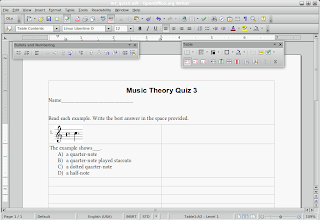
To get the lettering format I used, click the 'Numbering On/Off' button on the main toolbar, and then click the 'Bullets and Numbering' button on the resulting, floating toolbar. In the 'Bullets and Numbering' dialog, click the 'Numbering type' tab and select the matching option and click 'OK.' 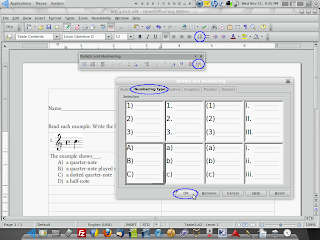


This is the time to admire our handiwork a little. Using the 'PDF Export' feature of Writer, we can make a high-quality PDF file for viewing and printing. The 'Export Directly as PDF' button is located on the main toolbar in Writer, so go ahead and click it. Give your file a name in the resulting dialog, choose a location and click 'Save.' Now, open the PDF in Adobe Reader and zoom way in.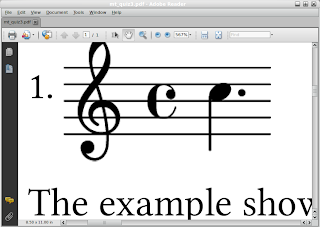
That's pretty good, but the graphic looks a little fuzzy (click the image for a closer look). Fortunately, we can fix this in the OOoLilyPond editor window. In Writer, click on the music example to select it, then click the 'OLy' button again to reopen the editor. Then, click the 'Config' button to open the Configuration dialog. On the right, there's a box for setting the resolution for LilyPond's graphic output. The default is 300 which is a little low. You can adjust it to suit your own sensibilities. The maximum is 2400, so I'll type that in and click 'OK' to return to the OOoLilyPond editor. 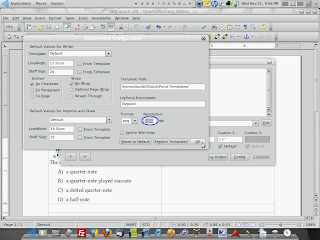
In the editor, I'll click the 'LilyPond' button to recompile the music example at the new resolution. After that, export your file to PDF again. If Writer asks you whether you want to overwrite the existing file, choose 'Yes.' Go back to Adobe Reader and check the result. 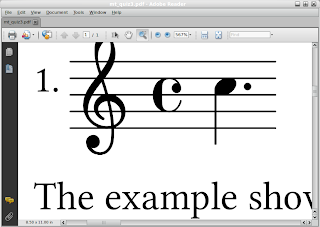
As you can see, the graphic is much sharper. Now that we have things the way we want, it's time to get back to work.


At this point, it's a good idea to copy and paste what you've already done into the remaining table cells and then edit each individual example and quiz item from the clones of the first one. That will save you time in formatting additional cells, since the formatting is copied along with the text. All you'll have left to do then is to modify the existing LilyPond code and text. Once you're finished, keep a copy of the document as a template for future quizzes. Once you get proficient with the small amount of LilyPond code you'll need, you can whip up a quiz or worksheet of this length in about 20 minutes.
As you can see, high-quality, professionally crafted lesson materials are well within reach with the right tools. When linked together by the OOoLilyPond extension, OpenOffice.org and LilyPond provide the perfect one-two combination for quickly and easily forging top-rate worksheets and quizzes. By having access to the powerful and flexible LilyPond engraving program right inside OpenOffice.org Writer, we can eliminate the need to deal with two programs separately. Because we're using two distinct, specialized tools for the purposes they're intended for, we don't need to force any application to do a task it's not well suited to. We can have the best of both, with the drawbacks of neither.

You can download a copy of the full quiz made for this post by clicking these links: *.odt (OpenOffice.org) *.pdf (Adobe PDF)
Text and images Copyright © 2009 David B. Stocker
No comments:
Post a Comment