First, open your favorite text editor and create your new LilyPond input file. Save it to a convenient location with the name “string_run.ly” For this demonstration, I use GNU Emacs, which has good LilyPond syntax highlighting. Syntax highlighting is useful for quickly spotting mistakes in the code. (Ctrl+click on images to display them in a separate window at full size.)
Sunday, February 28, 2010
LilyPond: abusing \glissando to indicate scale runs on parallel strings
First, open your favorite text editor and create your new LilyPond input file. Save it to a convenient location with the name “string_run.ly” For this demonstration, I use GNU Emacs, which has good LilyPond syntax highlighting. Syntax highlighting is useful for quickly spotting mistakes in the code. (Ctrl+click on images to display them in a separate window at full size.)
Wednesday, November 11, 2009
OpenOffice.org And The OOoLilyPond Extension – Part Two
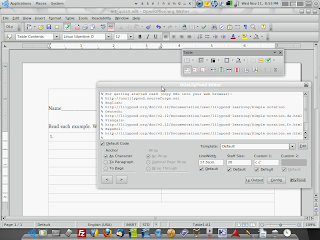
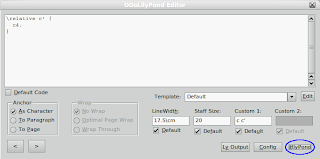
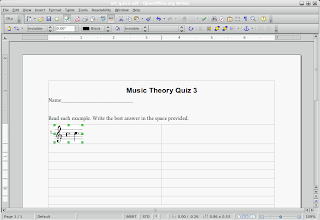
Throughout this installment, click on images to view them at higher resolution.
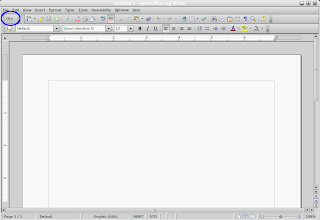
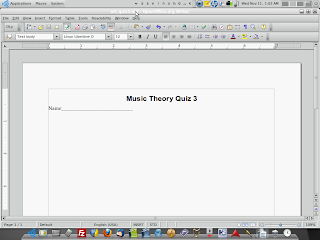
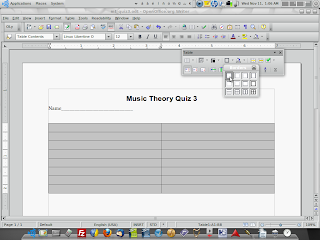
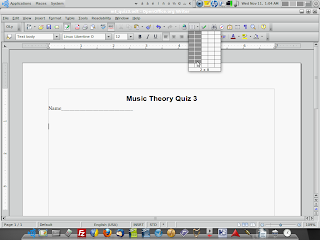 Now we have a 2 x 8 table inserted into our document. Those grid lines are a distraction, so let's get rid of them. Select the whole table by pressing Ctrl+A. The table should now be shaded. On the floating 'Table' toolbar, click the 'Borders' button, then click the first button in the drop-down, the one that shows a square with no black lines around it.




Monday, November 9, 2009
OpenOffice.org And The OOoLilyPond Extension – Part One
Note – this is part one of a two-part post on using OpenOffice.org with the OOoLilyPond extension for documents used in a Music Education setting.
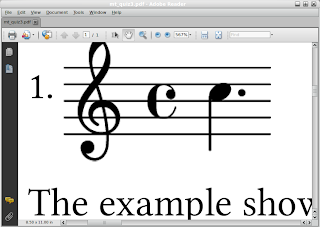
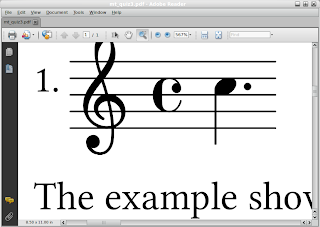
In the past, mixing music and text in a word-processing document was complicated and time consuming. We were forced to choose between two less than optimal methods: exporting music examples one-at-a-time from a score writer into a text document, or typing text into a score writer between and around the music examples. The first choice required importing multiple graphic files, generated by the score writer, and placing them in the text document. Dealing with multiple files was inconvenient and could be a time drain. In addition, if the graphic excerpts were to be of fair quality, the file sizes could quickly become unmanageable and dealing with several of them in a single document often resulted in reduced performance of score writing and word processing programs on machines with modest specifications. This scenario usually ended in a compromise on the quality of the music examples, leading to worksheets and test papers that looked unprofessional (click images to enlarge).  The second option produced better-looking output all the way 'round, but even the most expensive score writers did not handle text well. Paragraphs, bulleted or numbered lists, and text layout had to be faked by using spaces since the score writers' text utilities didn't handle common word processing tasks natively. Also, measures, staves and systems all needed heavy manual
  formatting in order to fit most worksheet or exam styles. With the second method, the results were definitely superior. However, it was even more time consuming than the first method. No matter which choice you made, the results were always mixed at best, forcing a tradeoff between quality and (relative) ease. But now there's a third choice: use a scoring program to make your music examples right inside your word processor by using a native plug-in.
Using two freely available software applications, music educators can print worksheets, exams, quizzes, custom lessons or any other document that uses printed music examples alongside text instructions. OpenOffice.org, the full featured, open-source office suite and LilyPond, the flagship open-source music engraver are both top-notch, free programs. In the past few years, LilyPond has matured into a real force in music engraving software. It produces beautiful music engravings that are the envy of expensive commercial programs. OpenOffice.org, with its support of open standards for document file formats has become a mainstay of Governments and Higher Learning and, more recently, schools and businesses.
OpenOffice.org is every bit as functional as Microsoft Office and has a familiar interface common to many office software suites. Since it's available for Windows, Mac OS and GNU/Linux platforms, it's an option for virtually anyone who uses a computer. What's more, with its impressive selection of available plug-ins, it's functionality is customizable for a staggering array of tasks and working environments. One of these plug-ins is the OOoLilyPond extension. With OOoLilyPond for OpenOffice.org Writer and Impress, you can use LilyPond right inside your text document or slide presentation. This method involves learning some LilyPond code (LilyPond uses a text-based markup syntax rather than a point-and-click graphic interface), but the minimal code required to use the OOoLilyPond extension is well-worth learning for the time and trouble it will save you.
For the next installment, we'll create a short, multiple choice music theory quiz using OpenOffice.org with the OOoLilyPond extension. Unless you already have all three required components for this project (OpenOffice.org, LilyPond and the OOoLilyPond extension), you'll need to do some preparation. Here's your homework:
Download and install the latest OpenOffice.org suite from the OpenOffice.org website – http://www.openoffice.org/
Download and install LilyPond from the LilyPond website – http://lilypond.org/web/install/ LilyPond is developing rapidly, so if you like bleeding edge software, be brave and get the latest 'development branch' (currently 2.13.7-1). The development branch is typically very stable.
Grab the OOoLilyPond extension from Sourceforge - http://ooolilypond.sourceforge.net/ The download, installation instructions and other information are all on the same page.
Read up on some LilyPond syntax in the online documentation – the Tutorial section of the Learning Manual is an excellent place to start.
Sunday, October 25, 2009
Interview
Transcribing popular music is largely a behind-the-scenes affair. While not completely anonymous—I usually get a byline—the artists whose intellectual property I render into sheet music receive the praise and credit for their art and really, that's the way it should be and I'm fine with that. Occasionally, however, I do receive correspondence from a reader or musician whom I don't know, and I'm always humbled when it happens.
Last week, I was surprised to receive an email from Ben Frankis, a student at the Academy of Contemporary Music in England. He's finishing up his studies in Guitar there and is writing a thesis on transcribing, a pursuit he's entertaining as a source of income. As part of his research, he asked if I would answer some questions about transcribing and how I go about it. His questions are, I feel, good ones for anyone who is seriously considering doing work as a professional transcriber; so I asked for his permission to post the questions and answers here and he consented. Here are his questions and my answers:
Ben Frankis: Have you received formal music training, if so what?
David Stocker: The first formal training I received was in a Classical Guitar class I took in 7th Grade. After I moved to Central Virginia with my family in '89, I was mostly self-taught. By 'self taught', I mean that I spent hours upon hours in my room learning by ear (I didn't realize it at the time, but these would prove to be my formative years—learning by rote the songs and techniques of my favorite guitarists). In my Senior Year at High School, I took a Music Theory class (the only formal music class I took between Middle School and College). Throughout High School and College, I played in bands in the Richmond area.
After High School, I began studies at Virginia Commonwealth University's School of Music, where I eventually earned a Bachelor of Music degree in Classical Guitar Performance. In that time, I also studied Piano, Jazz Guitar, Music Theory and Music History (as well as Philosophy and Religion). I graduated in 1998.
After VCU, I spent about 18 mo. at Arizona State University studying Music Education. Ultimately, I settled on music publishing and discontinued my studies.
BF: How did you start to transcribe professionally?
DS: In the Spring of 2001, while I was teaching private guitar lessons, I started emailing editors of guitar magazines, inquiring about working as a freelance transcriber. I had always been able to learn recorded music by careful listening and experimentation, and so was confident in my ability to do it for work. After sending in samples of transcriptions and getting some feedback from editors, I began to receive assignments from publishers.
BF: Do you use any software or tools to help you work out a piece of music and/or to notate it, if so what?
DS: I use a program called Transcribe! to assist in the work of transcribing. The program allows you to slow down recordings, isolate right or left channels, loop sections of the recording and has a number of other useful features. Most of my transcriptions are hand-written. When I do engravings, I use Finale, Sibelius or LilyPond depending on the client. I recommend LilyPond to clients, especially for Classical music engravings because of the high quality output it produces.
BF: Do you have a set process when transcribing?
DS: When I start on a transcription, the first thing I do is load the sound file in Transcribe! Then, I listen to the entire track 2 times through. On the third pass, I start adding markers and text blocks to the transcription file. The markers help me to navigate through different sections of the song quickly. I use the text blocks to label sections and add details about what is happening with the music, like what instruments are playing and when they come in, their orientation in the stereo image, etc.
BF: To what extent should a guitarist be stylistically and technically proficient if they want to work as a professional transcriber?
DS: It's important to know the range of the guitar and be familiar with the various tunings modern guitarists are using. I'd estimate that about 1/2 to 2/3 of all the music I transcribe is in some derivative of standard tuning. The rest is in something else, mostly Drop D, but there are several others that pop up now and then—open tunings, DADGAD or what have you. Open tunings are especially prominent in styles where there is a lot of slide playing like in Blues or American Country music.
A working knowledge of various guitar techniques—picking styles, harmonics, fingerstyle, capo usage, etc.—is essential. It's also good to have experience with the various effects and signal processors in wide usage today. A good grasp of Music Theory is also important. Most of the music I transcribe is in traditional "guitar keys" like A, E and D minor or C, G, A, D or E major. Occasionally you get something less common like B major or G minor, so it's good to be flexible and to be able to think in all keys. Having some knowledge of modern studio recording techniques is a plus.
As for styles, the most important thing is to approach new music with the mind of a beginner and not to assume too much from the outset. It's critical that you can identify and reproduce the sounds you hear on a recording. Usually, the technical aspects of a given style are readily apparent, but that's not always the case. Nailing down techniques in a style that you're unfamiliar with often means doing some research, which usually means watching video of live performances.
BF: What do you consider to be the most important skills required in transcribing?
DS: Being able to cut through effects and draw out the notes. Listening for tone differences and being able to identify by sound what kind of instrument someone is playing and what kinds of effects they're using. Fluency with music notation and terminology. And of course, technical proficiency on the instrument you're transcribing for.
BF: What advice do you have for someone pursuing a career as a professional transcriber?
DS: Learn to play a lot of music by listening to it. Strive to emulate your favorite players and styles, but also, don't be afraid of trying something new now and then. Become a proficient sight-reader.
BF: Why do think you have been able to have a successful career transcribing?
DS: I've been successful because I don't let go of a transcription until I know I've done everything I can to make it the best that I possibly can. My process is under a continual process of refinement. I like to try new things and I've learned to keep what works and shed what doesn't. I also have a policy of total honesty with my clients with regard to deadlines and my own capabilities. Potential employers appreciate when you're honest with them, even when sometimes you just want to tell them what they want to hear in order to get the job. In a real work environment, where there are real deadlines, it's important to be realistic about work quality and time frames, so that the ones who are depending on you can in turn be depended upon.
Sunday, October 18, 2009
The Keys to Great Looking Manuscripts
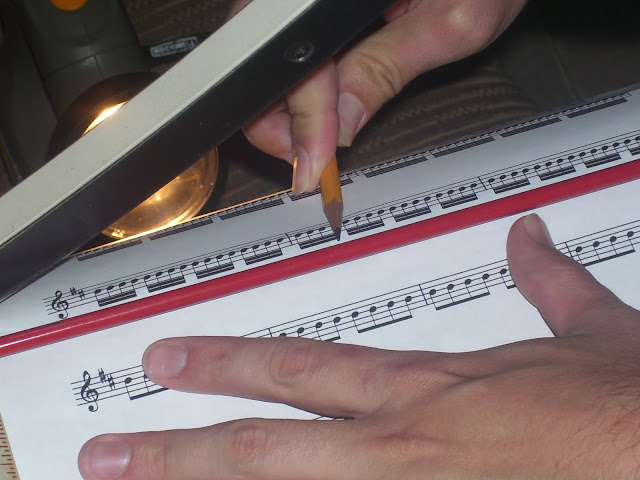
- Mechanical Pencils – 0.5 mm and 0.9 mm thickness
- Refillable Click Erasers
- 12'' Metal Ruler for drawing lines
- A small T-square
- One line with one bar, filled with 32nd-notes
- One line with two bars, each filled with 32nd-notes
- One line with three bars, each filled with sixteenth-notes
- One line with 4 bars, each filled with eighth-notes
- One line with 5 bars, each filled with eighth-notes
- Read, Gardner. Music Notation: A Manual of Modern Practice, Second Edition. New York: Taplinger Publishing Company, 1979. Print
- Gerou, Tom and Lusk, Linda. Essential Dictionary of Music Notation. Los Angeles: Alfred Publishing Co., Inc., 1996. Print
Tuesday, March 17, 2009
New site up for testing.
The new website is now up for testing. If you feel like it, leave comments in the comments section. The url is http://www.notesettersinc.com/ There are still some empty pages where the content is not yet finalized, but for the most part, it's in its final form.
Dave
Saturday, February 28, 2009
New Website
For the last month or so, I've been working on a much-needed face lift to the old website I originally put up in 2002. The site hasn't changed much since then, and it really is time to put a new public face on who I am and what I'm doing. The site also highlights some of the charity work I've been trying to get off the ground. You'll see when you finally can check it out.
The new site has a 'crumpled paper' theme and is coming along nicely, thanks in part to KompoZer. I've even learned a (very) little html, which has been interesting. When I put the site up originally in 2002, I used Microsoft Frontpage. KompoZer is similar (WYSIWYG) but is open-source, which is important to me. Working on the new website has been a long process but it's really starting to blossom.
With some luck, the new site will be up within the next two weeks. I'll link to it from the 'blog, so anyone following this endeavor will be able to bring it up and make suggestions.
Peace,
Dave


